

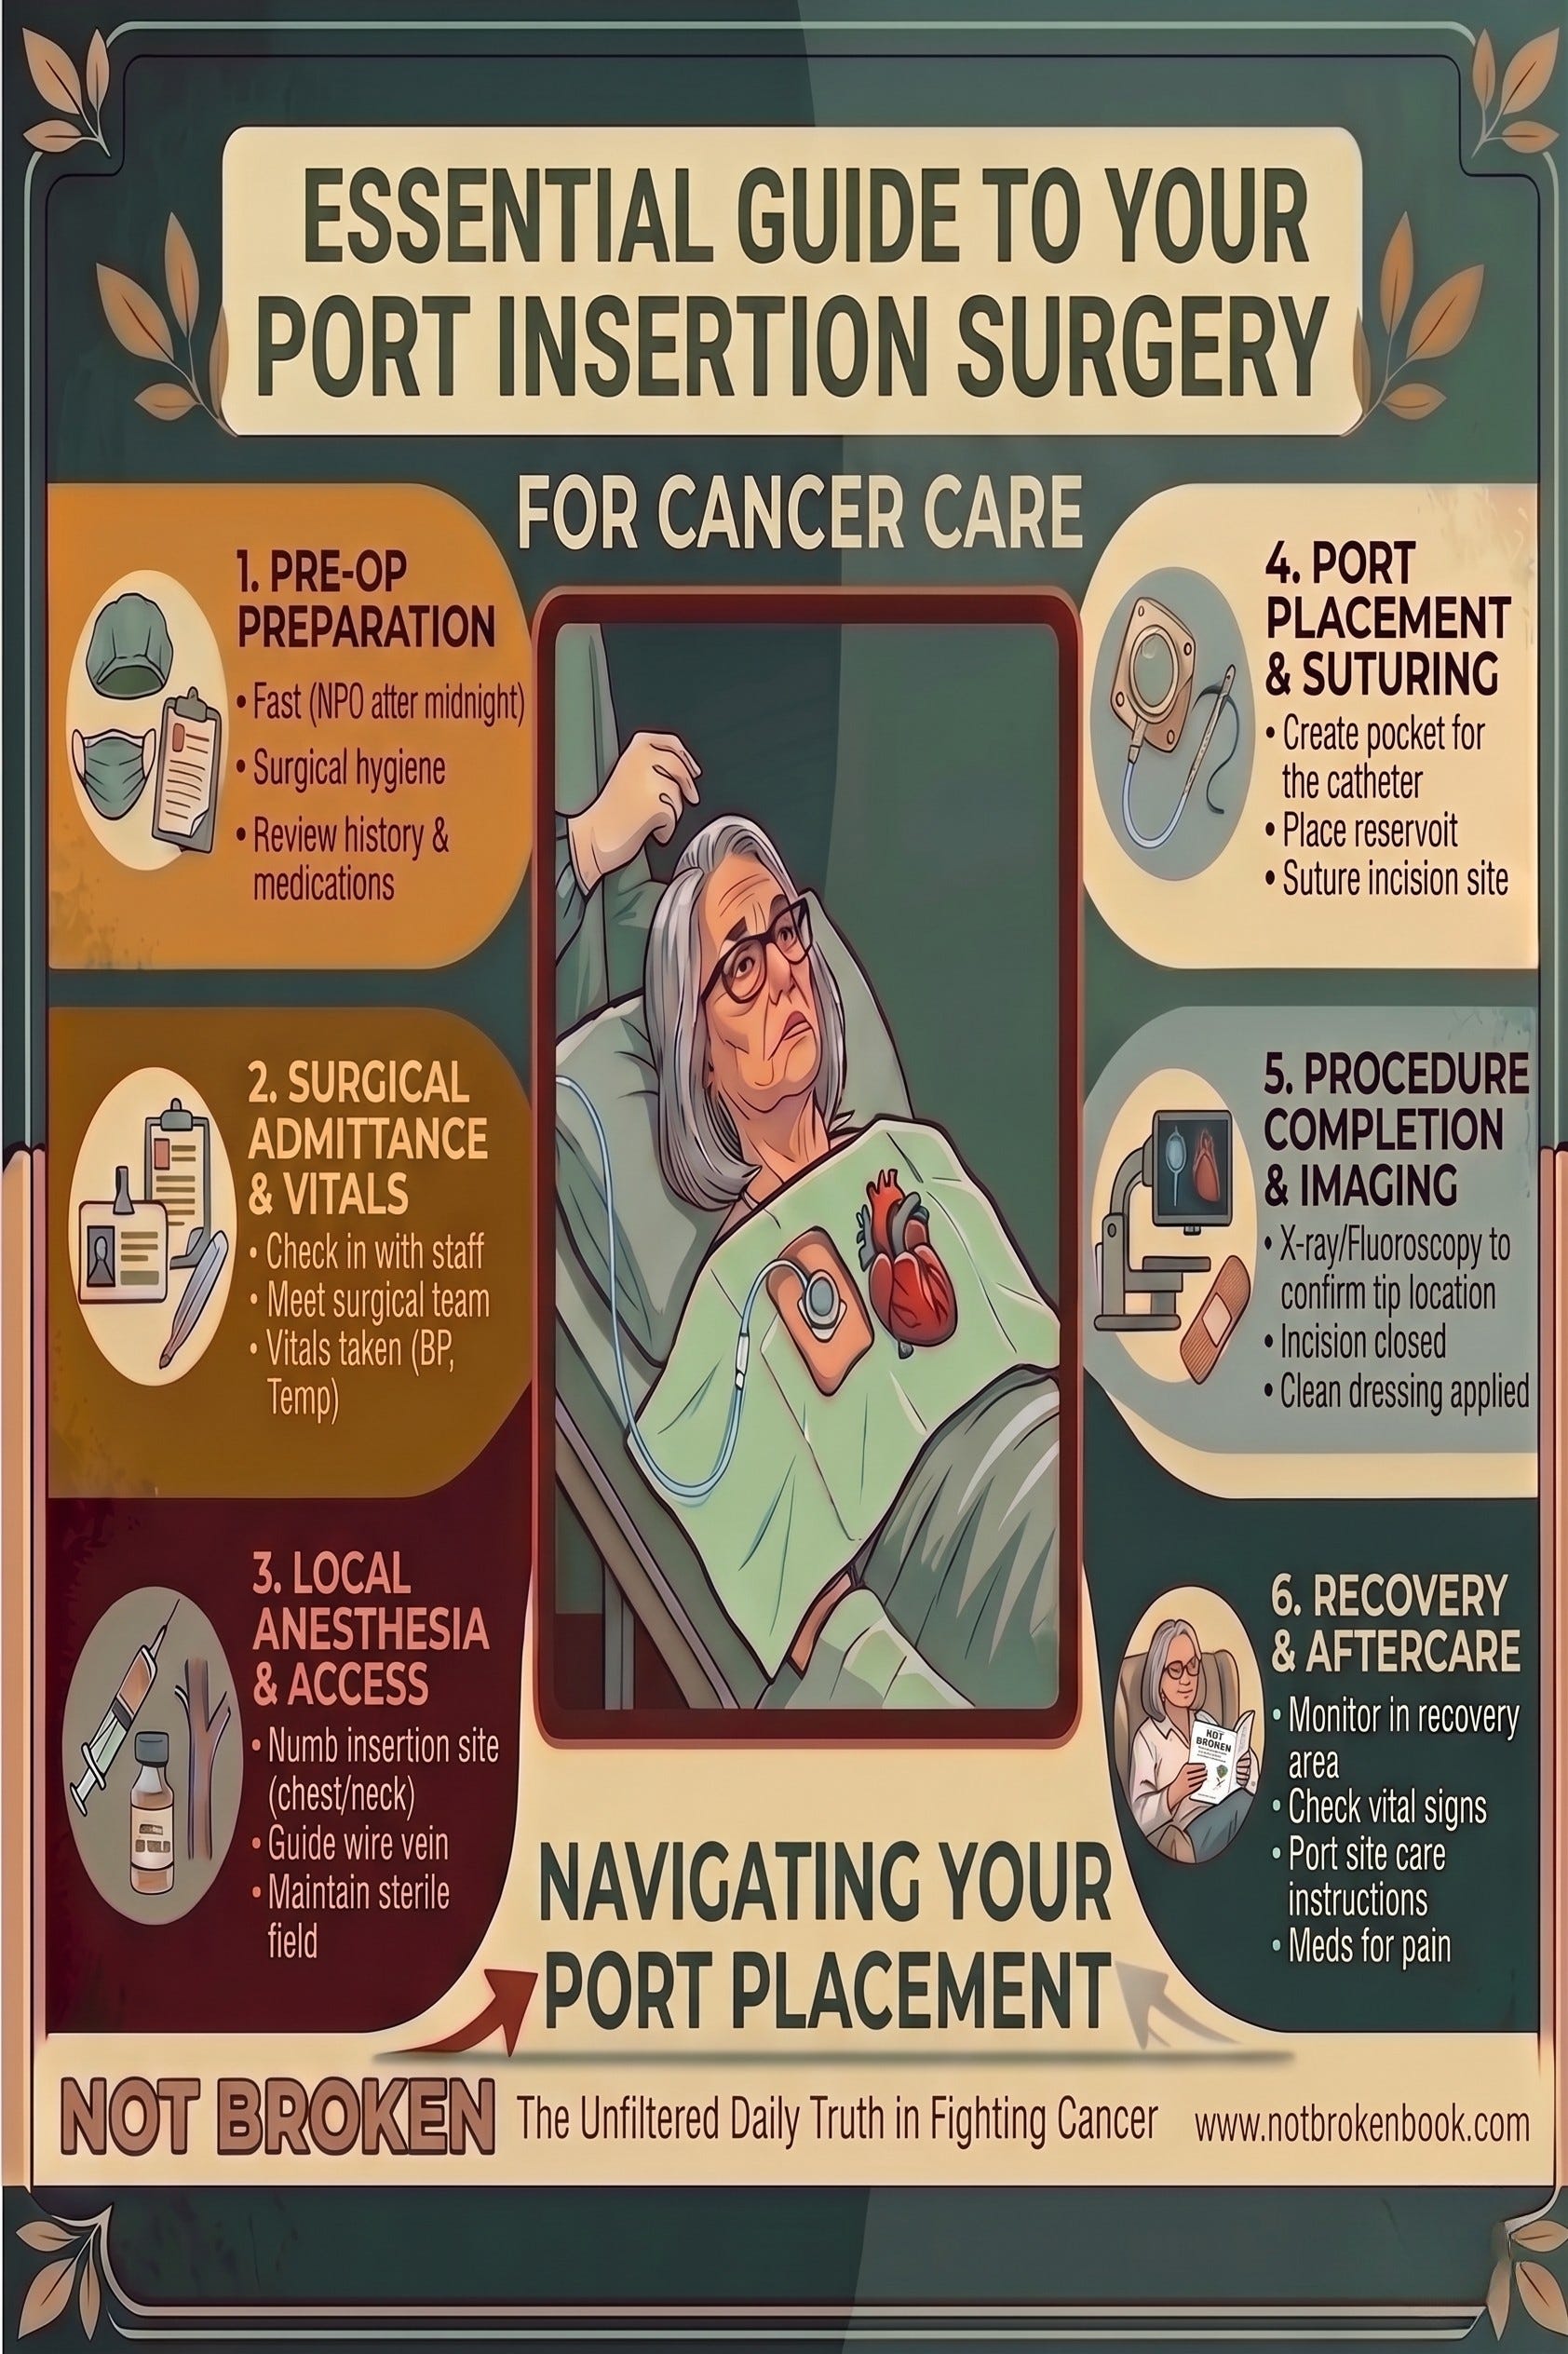
6 Standard Steps of a Port Insertion
#3 Essential Guides

Port insertion is a standard, minimally invasive surgical procedure that provides long-term, reliable intravenous access for your treatments, blood draws, and hydration. A port is a small device implanted just under your skin in your chest. A thin tube connects this device directly to a large vein near your heart so medicine can be delivered quickly and safely.
Personally, I had no problems with my port insertion, and it was done as an outpatient in the hospital. Everyone seems surprised to learn that my colon surgeon did my implant. Apparently, it is common for a general surgeon to do this procedure.
Understanding the sequence and goals of the surgery can reduce anxiety about the process. Here is a list detailing the six standard phases of the procedure, allowing you to visually move from pre-operative preparation to final placement. As you read the list, it really seems surgically basic. Knowing these steps should ease your anxiety.
1. PRE-OP PREPARATION
Fast – No food (NPO) after midnight
Surgical hygiene – wash with special soap
Review history & medications with the care team
2. SURGICAL ADMITTANCE & VITALS
Check in with staff on insertion day
Meet surgical team
Vitals taken (BP, Temp)
3. LOCAL ANESTHESIA & ACCESS
Numb insertion site (chest/neck)
They did use general anesthesia for me but that was my surgeon’s decision.
Guide wire vein
Maintain sterile field
4. PORT PLACEMENT & SUTURING
Create pocket for the catheter
Place reservoir
Suture incision site
5. PROCEDURE COMPLETION & IMAGING
X-ray/Fluoroscopy to confirm tip location
Incision closed
Clean dressing applied
6. RECOVERY & AFTERCARE
Monitor in recovery area
Check vital signs
Port site care instructions
Meds for pain. I was told Tylenol.
If this article was helpful, my book, NOT BROKEN The Unfiltered Daily Truth in Fighting Cancer goes deeper into the day-to-day realities of cancer—honestly, practically, and without filters.
Read more about the book contents here → www.Amazon.com/dp/B0GT2G4S3D